Learn once and for all how to plan your application development project, which steps you cannot miss in your planning and, on top of that, learn about some tools that can help in this process.
One of the biggest mistakes that many developers make when starting a project is jumping straight into development, be it with nocode tools or not, before even planning the application.
Some do this because they think they know everything that will be needed and developed in this project and they think that this will be more productive,
Others do this due to a lack of knowledge in best softwares development practices.
You can be sure that these projects will either have holes or will take much longer than necessary to complete, all due to the lack of good initial project planning.
This is not only valid for projects with external clients, but it is also valid for the development of your own personal projects or side projects.
In this video I want to show you the 7 phases of the NoCode StartUp method for carrying out application planning.
These are extremely important phases that can and should be carried out even before we enter the development stage within the tool.
Table of Contents
There is a lot of planning that can be carried out, even before we want to open the platform that we are going to use to develop our application. Be with Bubble, FlutterFlow, WeWeb, AppGyver, any nocode tool or even (and especially) with code.
We divided our planning into 7 phases, which I will present here for you now, let's show this visually to you.
In the end, I still want to present to you some tool tips that can help us a lot in some of these phases.
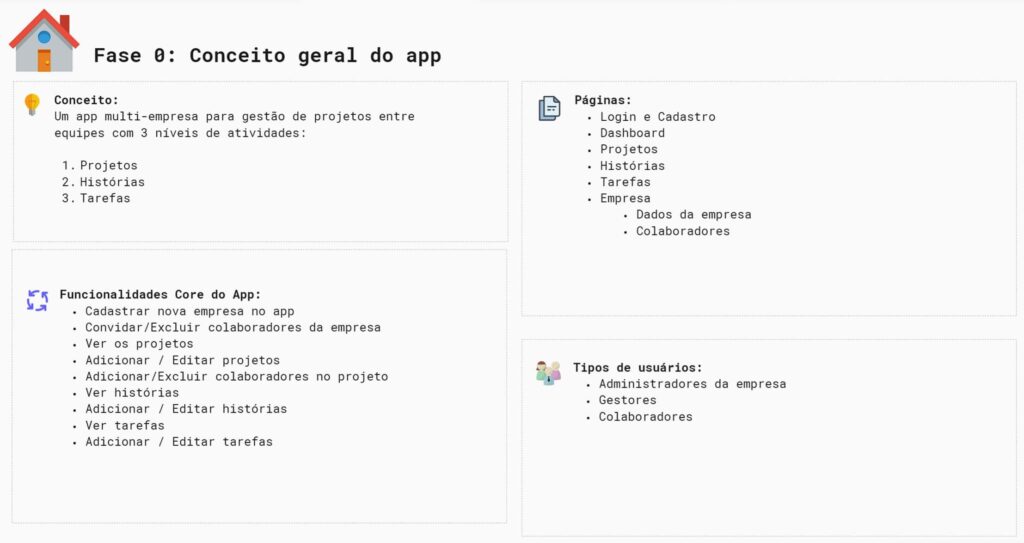
Phase 0 – General Application Concept
Phase zero is the general conceptualization phase of the application, that is, here we will define exactly what our app is, what its objective is, what it does, etc…
This phase is extremely important as it will be the basis for all the others.
Everything comes from this conceptualization, which is why this mapping must be extremely well done and aligned with the client or anyone involved in the project.
In the end, this ends up practically becoming a scope of the project, what will be done and what is expected.
Here, as an example, I brought some of the points that can be raised at this stage of planning the application:
App concept: in this case we are talking about a multi-company project management app.
We can collect requirements, or basically functions of our app. Listing what we expect the app to do.
(We have some content about requirements gathering, which you can see here on our blog or on our YouTube channel.)
We can list the pages that our app will have, type of users, user permissions and so on.
I believe you understand the importance of this step, right? Our entire app will be based on what we collect and write down here.
Phase 1 – Inspirations
Now that we know the objective of our application and all its requirements, we can look for inspiration.
Look for applications that do something similar to ours, to be inspired mainly by Usability.
In design there is a law called Jakob's Law – which says:
“People spend most of their time on other websites and prefer their website to work in the same way as all the other websites they already know”
In other words, users expect their website, app, system to have usability similar to the other apps that exist.
Important point: the idea here is to inspire us, NOT COPY.
Here in our example, we are creating a project manager and we already know the pages we are going to develop. This way we can look for inspiration in similar applications.
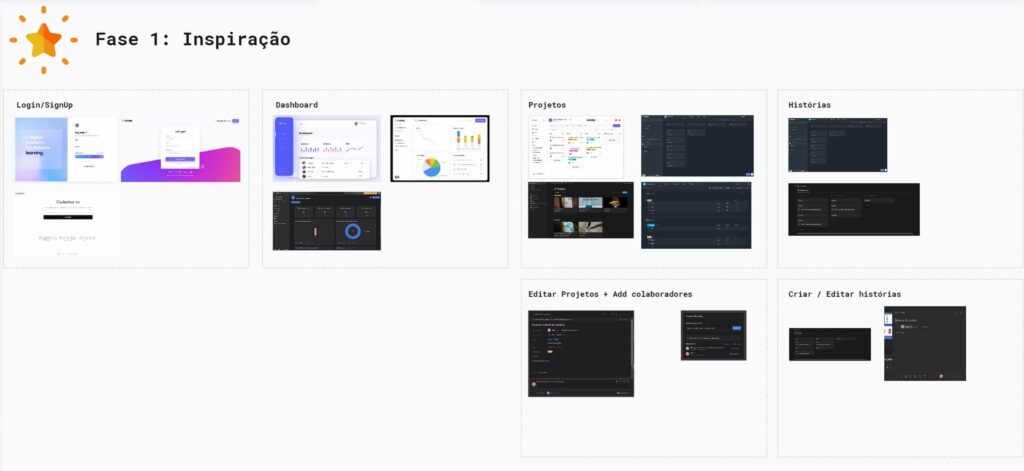
We brought here some inspiration for registration and login flows.
Some inspirations on how some project management systems like ClickUp or Asana show their projects to users and so on.
This way we begin to have an idea of how the market already does what we are trying to do, we can be inspired and, on top of that, improve the UX.
Now that we know the pages we are going to develop, what our app needs to do and we also have some inspiration, we can start designing our Wireframes
Phase 2 – Wireframing
Wireframes are nothing more than a low-fidelity design of our application, that is, here we will not focus on placing colors, visual identity, details, but rather we will focus on creating a first sketch of the elements that will be present in our app, in the their disposition and the experience we hope to pass on to our users.
This step is crucial, because with it we can start to visualize the face of our application and we can also get quick and objective feedback from those involved in the project.
With Wireframes we can remove distractions such as colors, design and focus on collecting feedback exactly about what matters at that moment, layout and usability.
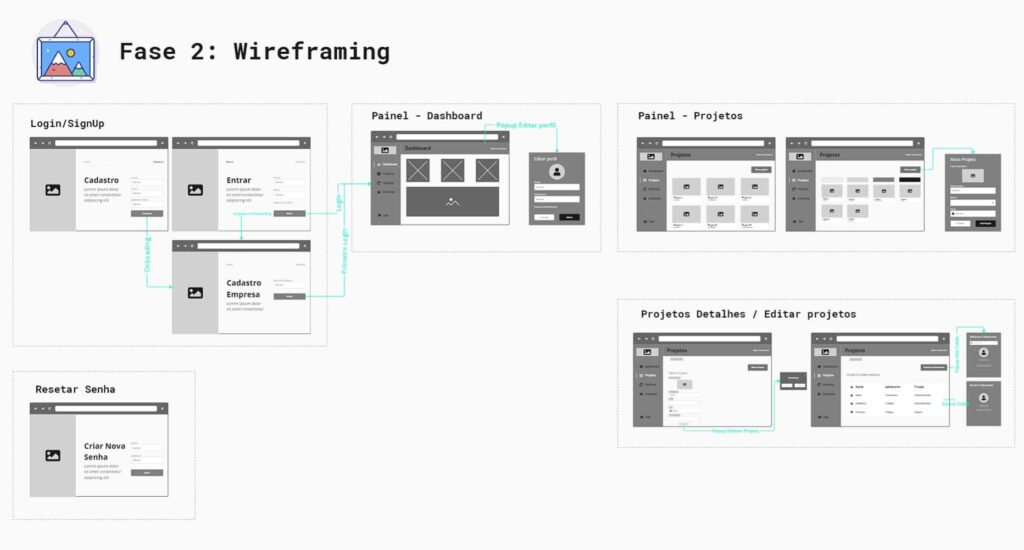
Here in our example, we can already see what our login flow will look like, how our dashboard will be laid out and so on.
Phase 3 – User Flows
This phase is very common to be carried out in parallel to wireframing and aims to document and detail all the flow of actions that each user can perform on the screens in question.
We detail all actions, permissions and restrictions considering each type of user for each screen or page.
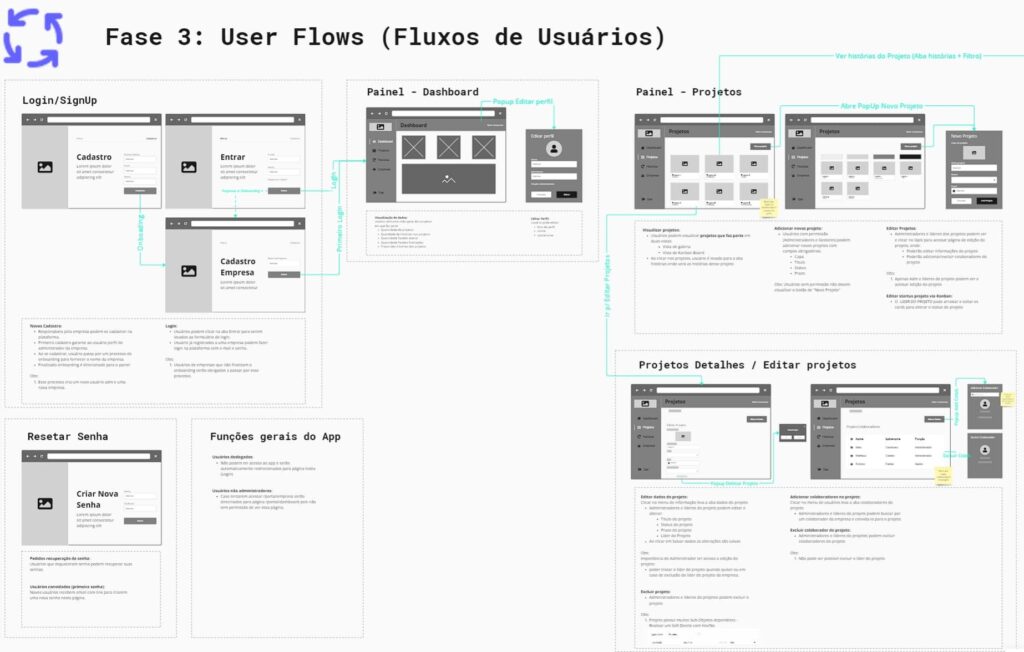
In our example here, on our login page, we detail the flows:
- New Registrations
- Login
Phase 4 – Data Modeling
I believe that this phase does not require such an important comment.
Data modeling is the heart of any application and must be done before we think about jumping into any platform to start development. This is what differentiates apps that will work well when there are more users than apps that will not.
Without good data modeling, applications are destined to cause major problems in the future. Failures in modeling can lead to slowdowns, a drop in performance and in some cases the solution will be a complete refactoring of the app.
Since data is the heart, you end up building your app based on data modeling. The logics end up being designed according to what was designed in this modeling. That's why it's important to invest a lot of time in this modeling before even thinking about using the tool.

Here in our example we can see which tables will be needed in our app, which fields we will have in each table and how they relate to each other.
Here our objective is not to teach how to do data modeling, however we have two free courses on YouTube on the topic, one on relational data modeling and another about non-relational data modeling, I highly recommend you watch it, I'll leave the video cards listed here.
Phase 5 – Security
This here is the most underestimated phase by all novice users and even some users with years of experience, it is a bureaucratic step, but extremely necessary and should also ideally be thought of before we start developing our apps, as there may be cases where We need to remodel some areas of our database to be able to implement 100% the expected security in our app.
In practice, this implementation varies from tool to tool, but at a conceptual level, the idea is the same.
We need to think about the fields in our database and basically say which fields can be seen by which type of user.
By doing this mapping, then we just need to implement it in our systems.
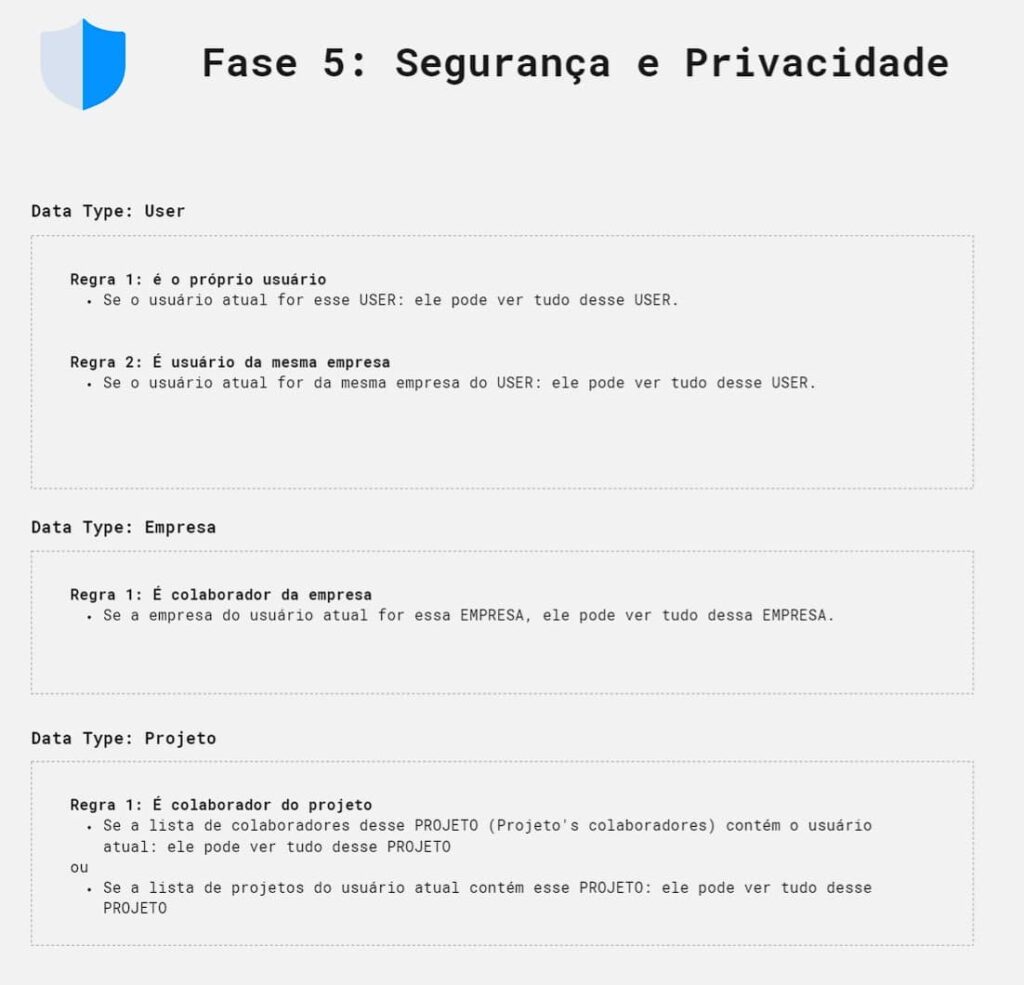
In our example, I passed Data Type by Data type and implemented the necessary rules to ensure that only those who can actually see the data are the only ones with access to it.
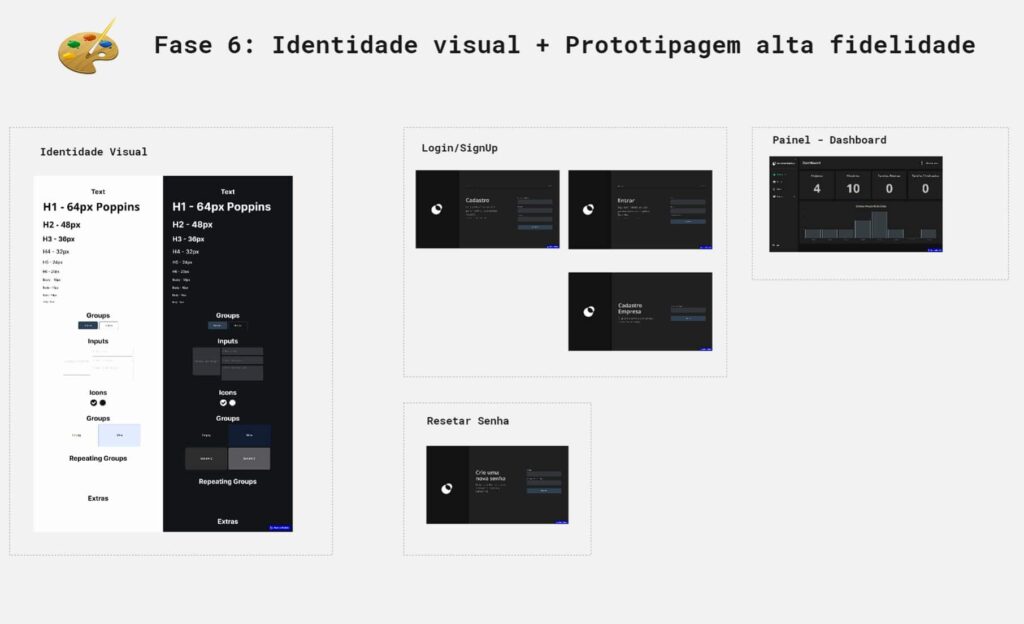
Phase 6 – Visual Identity + High Fidelity Prototyping
Now it's finally time to think about the design of our application.
At this stage we define the entire color palette of the project, default styles, fonts, etc… And we implement this in our application, based on what we have already built in our wireframes.
Furthermore, at this point we can choose to prototype our application in a tool like Figma, for example, and give a sense of life to this design and application.
It is important and interesting to comment here that if we stop to analyze, practically in all the phases mentioned here, we can carry out micro validations with our clients, this way we will advance the project little by little, with the client's approval.
This completely mitigates rework in more advanced stages of development, which take much longer to adjust.
As promised, here are some indications of tools that you may be using to carry out some of these steps:
General Planning:
- Look – https://miro.com/
Inspirations:
- Behance – https://www.behance.net/
- Dribbble – https://dribbble.com/
- WebFrame – https://webframe.xyz/
- Tailwind – https://tailwindui.com/
Wireframing:
- Look – https://miro.com/
- Figma – https://www.figma.com/
UserFlows
- PageFlows – https://pageflows.com/
Again folks, all of these steps can and should be done before we even think about opening our NoCode tool.
Of course, as your technical knowledge evolves, this process will become increasingly easier and you can also identify more Phases in this planning process specific to the tool you use.
I know some European and Australian development agencies, which have specific documentation processes and have already thought about the tool they use to develop.
I recommend everyone not to neglect this process, otherwise you will probably understand the reason later.
If you enjoyed this content and are also interested in this topic, within our training we will explore this topic further.
These examples that I gave here in this video are from a complete track that we have in NoCode StartUp Bubble formation, where I detail each of these topics step by step with you and later we build this Project Management application together.
Thank you, big hug and see you next week!