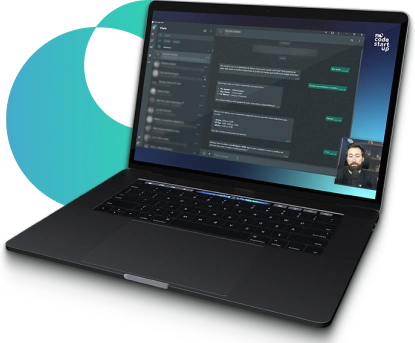
Did you know that integrating WhatsApp with N8N using an Unofficial WhatsApp API can transform your business automation?
WhatsApp's unofficial APIs are an interesting alternative for those looking for more flexibility and savings, without compromising legality.
Although Meta does not directly link these APIs, they do, however, make it possible to create robust automations, send messages, configure chatbots, and integrate systems with WhatsApp in a practical and efficient way. In this article, you will learn how to:
- Create your account on the unofficial API;
- Configure the integration with N8N;
- Automatically send messages via WhatsApp;
- Trigger smart automations with chatbots and AI;
- Use webhooks to receive and process messages.
All this using accessible tools, such as ZAPI and N8N, to transform your communication on WhatsApp into an automated and efficient process! Enjoy reading!
Unofficial WhatsApp API: What are they?
Unofficial WhatsApp APIs are developed by companies with no direct connection to Meta (the company responsible for WhatsApp). This does not mean that they are illegal, but rather that third parties offer solutions to integrate WhatsApp with automated systems.
While the official API is directly linked to Meta and has strict usage rules, unofficial APIs offer more flexibility and cost-effectiveness. Many companies use them extensively to create automations, chatbots, and send bulk messages.
If you want to understand more about the differences between the Unofficial WhatsApp API and Official WhatsApp Business API, check out the full article on the NoCode Startup blog.
Among the most popular Unofficial WhatsApp API options are:
- Z-API: tool widely used for its simplicity and advanced features;
- MegaAPI: known for its stability and technical support;
- Evolution API: stands out for its easy integration with other systems.
Why use Unofficial APIs on N8N?
Using an Unofficial WhatsApp API in N8N allows you to create robust and customized integrations, ensuring flexibility and savings in customer communication. Using unofficial WhatsApp APIs in N8N, you gain:
- Flexibility: customize message sending, create automated flows and integrate with other systems;
- Economy: use affordable alternatives without compromising functionality
- Speed of implementation: unofficial APIs are easy to configure and have detailed documentation;
- Full automation: send messages, automatic responses and create chatbots in a practical way.
In other words, with the Unofficial WhatsApp API, you can set up automated flows, send messages automatically, and even create smart chatbots.
Additionally, you can integrate these features with other tools to further expand their capabilities.
Next, you will understand how to configure your Z-API account and start integrating with N8N to optimize sending messages via WhatsApp.
How does the integration with the unofficial WhatsApp API work? Check out the step-by-step guide
Integrate WhatsApp with N8N Using an Unofficial WhatsApp API is a simple and straightforward process. The main advantage of this method is flexibility, as it allows create custom automations for sending and receiving messages.
This in addition to enabling the creation of chatbots and artificial intelligence (AI) agents. Let's understand how it works?
To perform the integration, we will use Z-API, one of the most popular unofficial APIs. ZAPI allows you to send messages and configure them automatically via WhatsApp. Here are the essential steps to configure it:
Step 1 – Registration on the Z-API API:
The first step is to register on the platform. To do this, follow the steps below:
- Go to the official Z-API website and click on the “Take a free trial” option. If you do not have an account yet, click on the link provided to start the registration process;
- Fill in the required fields with your information and, when finished, you will be directed to the Z-API control panel;
- In the Z-API dashboard, you will see a dashboard that displays your instances. Each instance corresponds to a linked WhatsApp number. To connect your number to the Z-API dashboard, click on the instance you want to use;
- On the instance screen, you will find a QR Code. To connect your number, open WhatsApp on your device, go to settings, click on “Connected Devices” and then “Add a device”.
- Point the camera at the QR Code displayed on the Z-API, in the same way you do to use WhatsApp Web;
- Once the number is successfully linked, the Z-API dashboard will indicate that the instance is “Connected”.
Now you are ready to start integrate WhatsApp with N8N and use the features of the unofficial API.
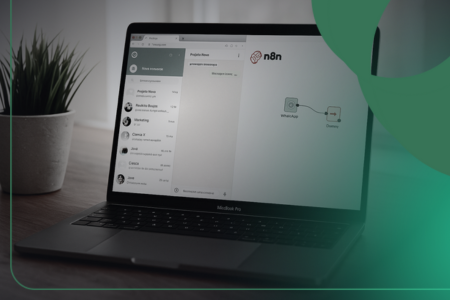
Step 2 – Configuring the API on N8N
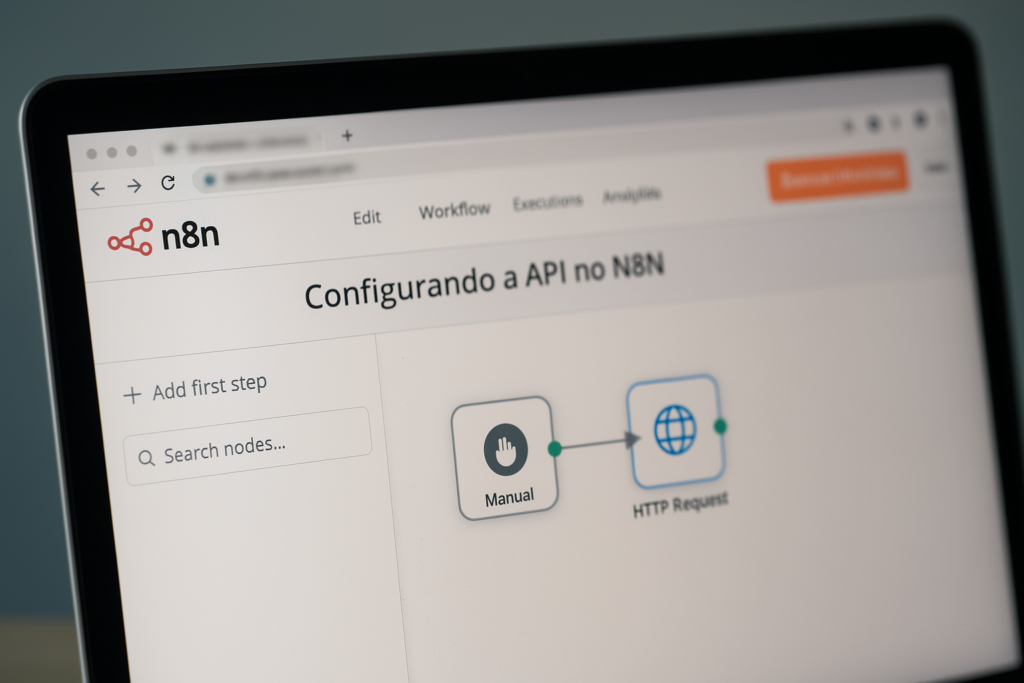
So the next step is configure API on N8N for the integration with WhatsApp to work correctly. To do this, follow the steps below:
- Access your N8N account and click on the option to create a new workflow;
- Add a manual trigger by clicking the add button and selecting “manual trigger” from the list of options;
Within the workflow, add a node of type “HTTP Request” to make the WhatsApp API call; - Set the method to “POST” and enter the URL provided by Z-API, which contains the endpoint to send messages (e.g., “api.z-api.io/instances/{your-instance}/sendText“);
- In the “Headers” field, add the authentication information, including the client token and the account security token, as indicated in the Z-API documentation;
- In the “Body” field, enter the mandatory parameters, such as the recipient’s number and the message to be sent.
- After configuring the necessary fields, click “Run” to test sending the message. N8N will display a success confirmation.
Once you successfully send the message, the N8N interface will display the response, confirming that the integration is working correctly.
Step 3 – Testing Message Sending:
Now that you have configured the API in N8N, it is time to test sending the message to ensure that the integration is working correctly. Follow the steps below:
- In N8N, click on the “Run” option to run the workflow you just configured;
- Check the N8N interface to see if the message “Node executed successfully” appears. This indicates that the flow was executed correctly;
Now, open WhatsApp on the device you linked to the Z-API and check if the message sent through the workflow reached the recipient; - If the message was not sent, therefore, review the API settings in N8N, especially the URL, Headers and Body fields;
- If the message arrived correctly, congratulations! The integration between WhatsApp and N8N using the unofficial API was successful.
Step 4 – Automating Message Receiving:
So far your integration is working correctly, the next step is to automate the receipt of messages in N8N:
- In N8N, open the workflow you created earlier or, if you prefer, create a new workflow.
- Add a trigger node of type “Webhook” to receive messages automatically;
- Set the webhook method to “POST” and choose a name for the path, such as “webhook-api-whatsapp”;
- Copy the webhook address that will be generated automatically;
- In the Z-API dashboard, access the linked instance and go to the Webhook settings;
- Paste the copied webhook address into the field indicated for receiving messages;
- Save your changes and return to N8N to verify that the webhook is active and ready to receive messages.
Then, whenever a new message is received on the linked WhatsApp, N8N will automatically capture it. In addition, you can configure additional actions, such as automatic replies or processing of the received data.
Conclusion

Integrating WhatsApp with N8N using an Unofficial WhatsApp API like Z-API is a practical and efficient solution to automate processes and improve communication with your customers.
By following the step-by-step instructions in this article, you are ready to transform your business's communication management with advanced and accessible resources.
So, how about starting now, becoming an automation expert with N8N? Take advantage now and access the NoCode Startup N8N course. A free 100% course that will teach you how to create incredible integrations and automate processes efficiently!
Don't miss this opportunity to learn from experts and enhance your automation skills.