special start of the year offer

Hours
Minutes
Seconds

Power BI: how to create dashboards without knowing how to program

data analyst

Estimated reading time: 9 minutes

You've probably been in a situation where you needed to analyze a large amount of data and felt a little lost. Maybe you thought it was impossible or even extended the project deadline to get it done.

What if I tell you that there is a solution to speed up this process and create a super complete report that will help you get your insights? This solution exists and is called Power BI, a Microsoft tool that allows you to create reports and dashboards without using code. 

In this content, we will show you how Power BI works, what a dashboard is and what are the advantages of using this system. Furthermore, we will show you step by step how to create your own visual panel. If you are curious and want to know more, continue reading!

What is Power BI?

Power BI is a famous tool in the world of technology and you've probably already heard about it.

It is a platform no code from Microsoft that does not require knowledge of codes. With this tool, you can create personalized and interactive reports, using a variety of data sources and visuals.

Within the Power BI system, there are features that allow you to explore, analyze and share data quickly and easily. It is made up of three main components:

Power BI Desktop

Power BI Desktop is a free desktop app that you can use to create and edit reports. It is an excellent tool for anyone who wants to work with data offline, locally or in the cloud. 

Power BI Online

On the other hand, Power BI Online is a online service that you can access through your browser and use to publish, manage, and consume reports. This service is ideal for those who work collaboratively, as it allows instant sharing. 

Power BI Mobile

Finally, there is Power BI Mobile, a app for cell phone or tablet which is used to view and interact with reports and dashboards. This way, you can access and view data from anywhere and at any time. It is a good option for those who value flexibility at work. 

These three components of Power BI work in an integrated and synchronized way, allowing you to work flexibly and consistently.

What is a dashboard?

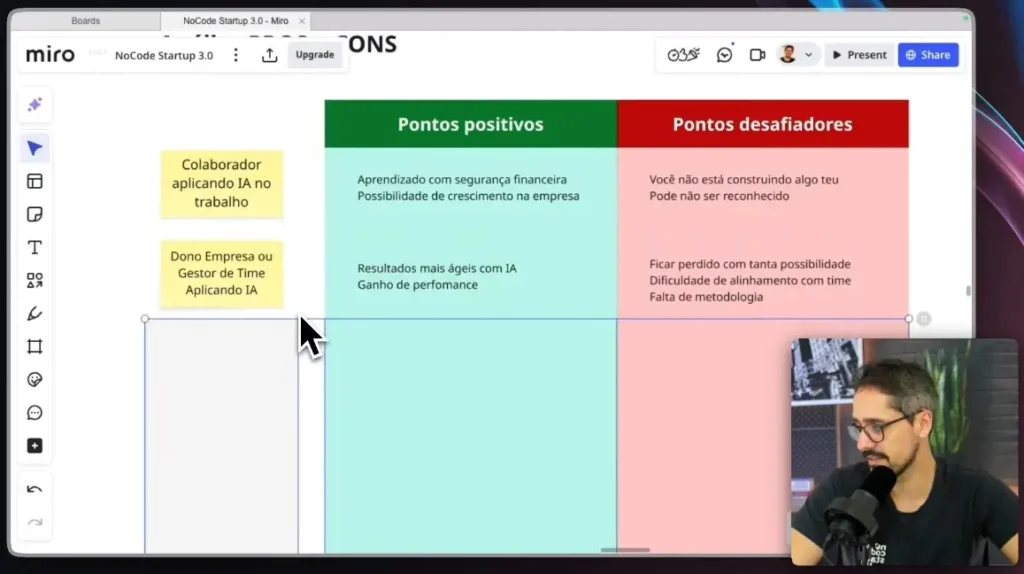
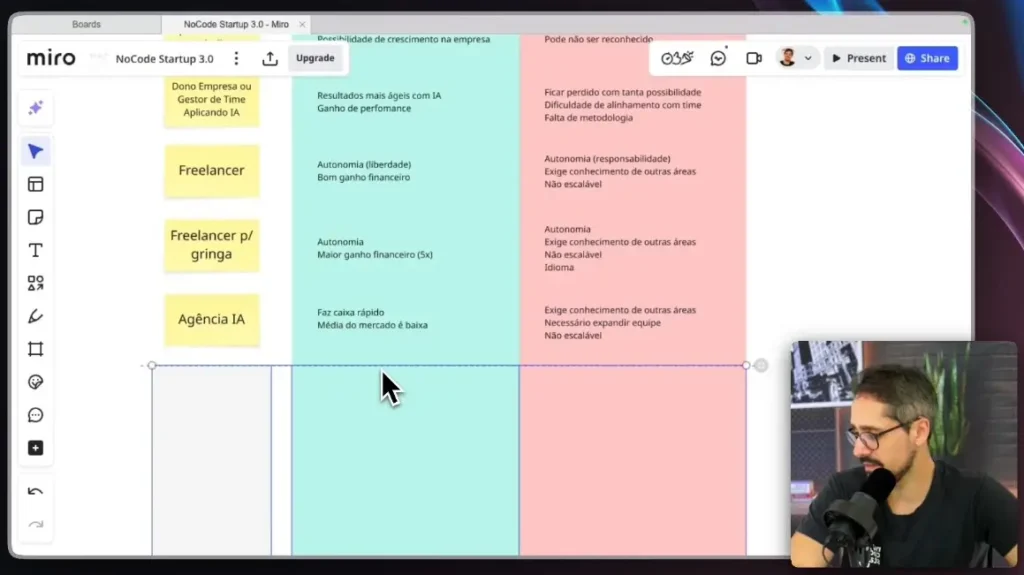
Imagine you have a technology startup and wants to know how your growth is going. You have a report with various data on your customers, products, total profit, etc. But how to connect all of this and be able to visualize it clearly?

That's where the creating a dashboard. The panel is like a summary of the report that will be generated by Power BI. It shows the most important information about your data in one place. 

The dashboard will display only the most important and interesting information about the data, such as:

  • Conversion rate;
  • Monthly billing;
  • Regions where customers are located.  

All this information is displayed visually, using graphs, tables, maps and other elements that help you see the data quickly and easily. See an example of a dashboard made in Power BI: 

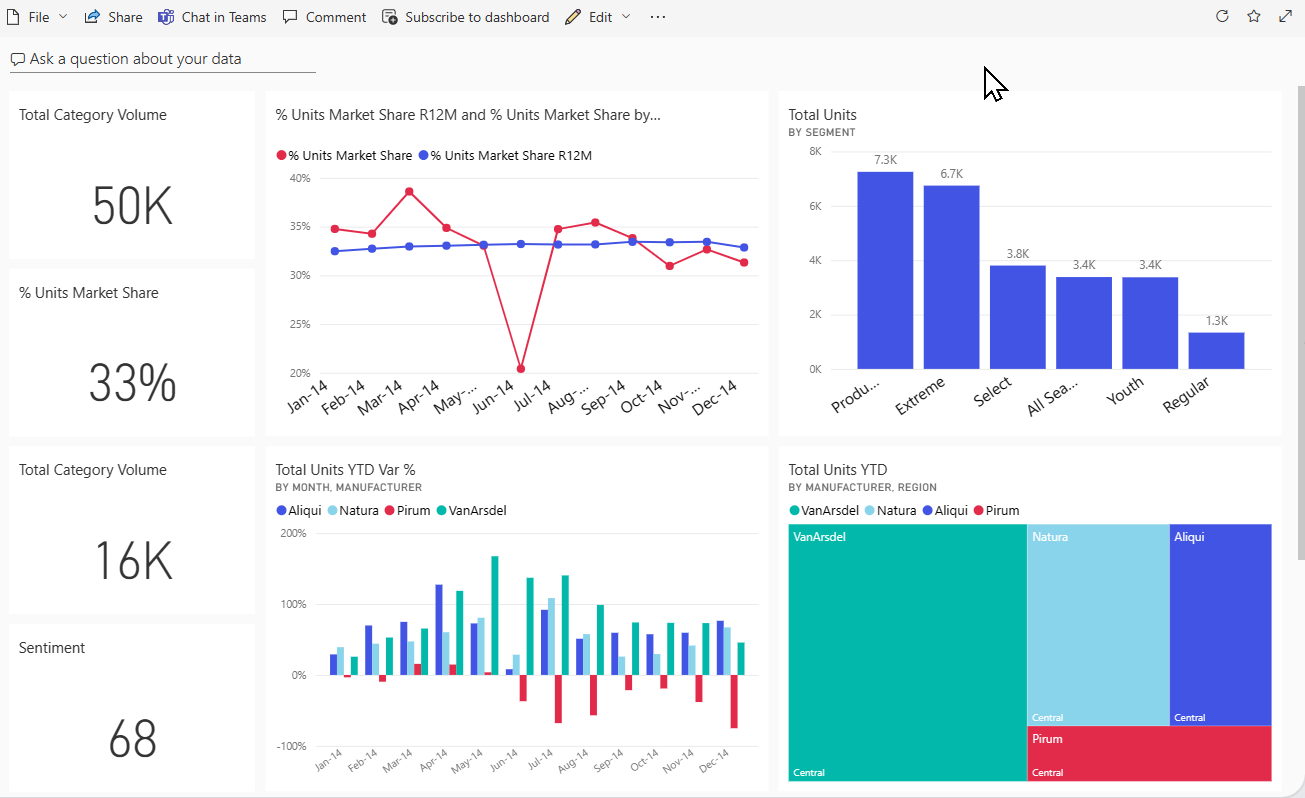
Image: Reproduction / Microsoft

Step by step to create a dashboard with Power BI without using code

Now that you understand what Power BI and a dashboard are, it's time to put it into practice. That's why, We have separated the step by step guide for you to create your own dashboard. Are you ready? Let's go!

Open Power BI

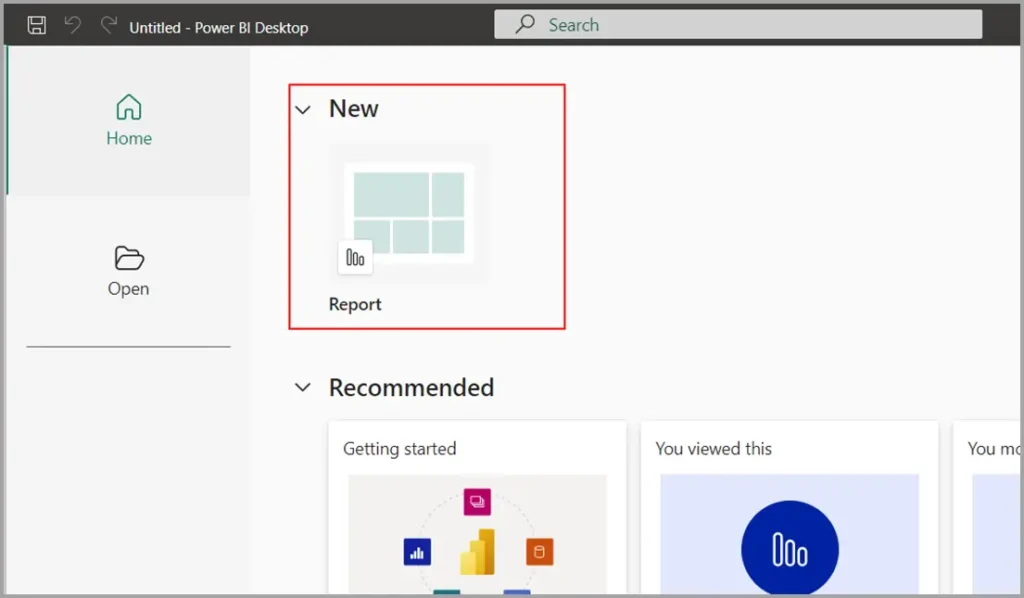
To get started, you need to open the platform in the desktop, online or mobile version. If you have never used it, You need to simply register with your corporate email

Insert database

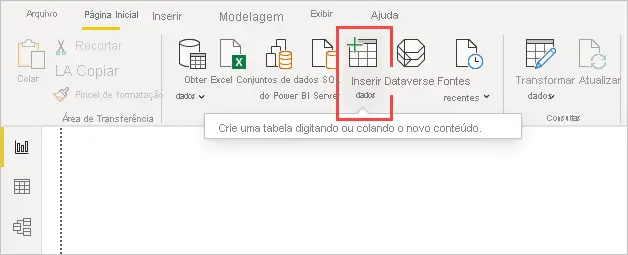
You can connect Power BI to various data sources, such as an Excel spreadsheet, for example. To insert the base, click Get data on the home tab and select the appropriate option. 

Then navigate to the file you want to use and click Open. Choose the spreadsheets, files, or other data source you want to import and click To load.

Give a title

You can give your report a title to easily identify it. To do this, click Report in the tab Exhibition and type the title you want in the box File name

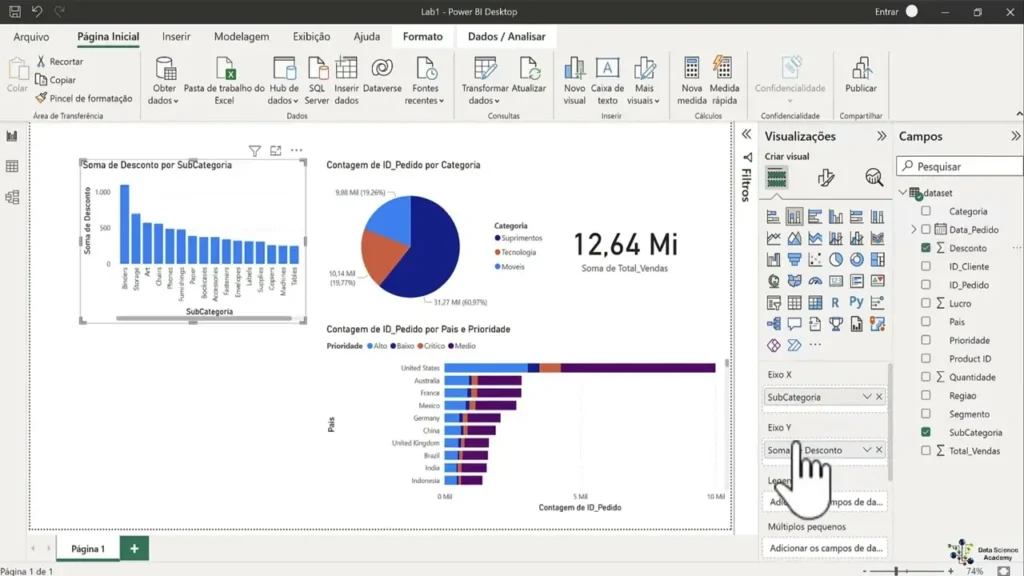
Insert dashboard cards

Dashboard cards are visual elements that show a single value or measure, such as total sales. They are useful for highlighting the most important information in your report.

To insert dashboard cards, click Card in the tab Views and drag it to the report area. Then drag the field you want to show on the card to the area Value

You can adjust the size, position and format of the card as you prefer and you can repeat this process to insert more dashboard cards with other measurements.

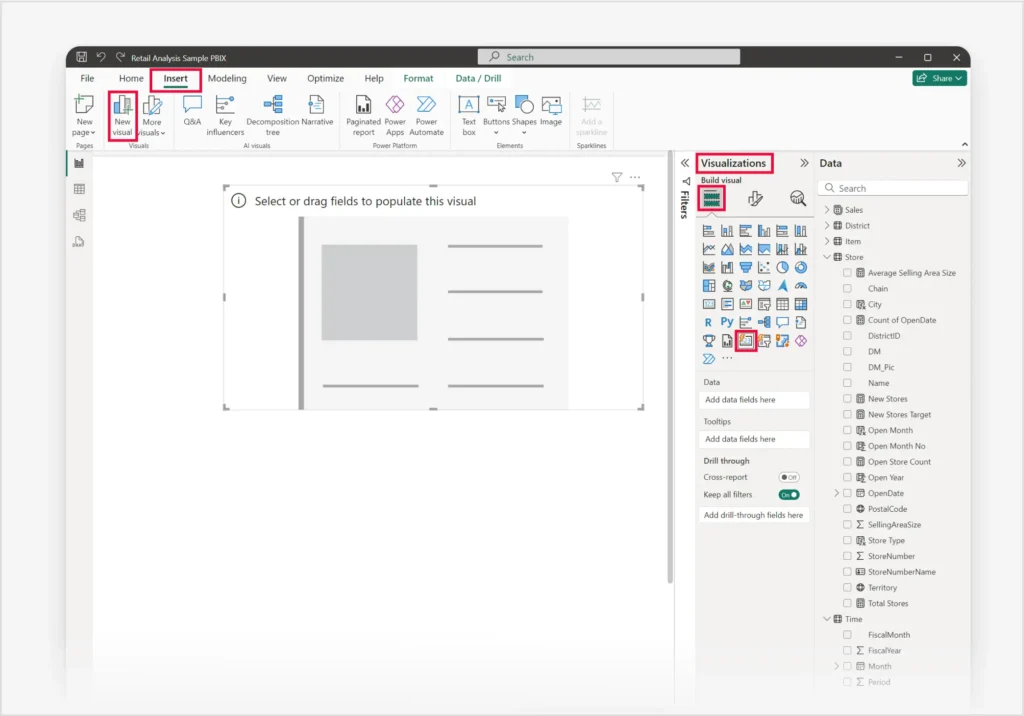
Time to put up the graphics

Charts are useful for exploring and analyzing data in a graphical and agile way. To insert, click the type of chart you want to use in the tab Views and drag it to the report area. 

Then drag the fields you want to show on the chart to the corresponding areas. For example, you can drag the field Date to the area Axle and the field Profit to the area Values to create a line graph that shows the evolution of profit over time.

Use the dashboard filter

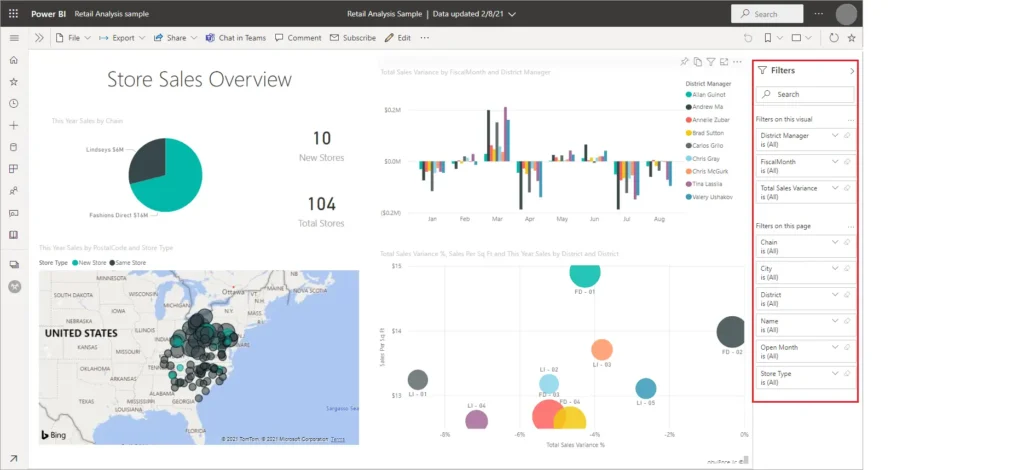
The dashboard filter is a feature that allows you to quickly and easily apply filters to your data. You can use the filter to change what is shown on your dashboard cards and charts, according to the criteria you choose.

To use the dashboard filter, click Dashboard filter in the tab Views and drag it to the report area. Then drag the field you want to use as a filter into the area Filters

To apply a filter, just click on the value that you want to select in the dashboard filter. To clear it, click the value again or click Clear selection.

What are the advantages of using Power BI?

Using Power BI has many advantages, whether for large teams or even for solo work. See some advantages:

Easy deployment

Deploying Power BI is very simple, because it Does not require complex installation or advanced configuration. You can download the Desktop version for free from Microsoft's apps store or even use the online version. 

Good accessibility

Furthermore, Power BI is a good accessibility tool. It allows you to access and view your data from anywhere, anytime. You can, for example, use Power BI Mobile to interact with your reports regardless of where you are. 

Live data monitoring

Live data monitoring is another advantageous function included in Power BI. With him, You can track data without having to manually update your reports and dashboards. You can even connect it to sources that offer streaming data, such as:

  • Azure Stream Analytics;
  • Event Hubs;
  • IoT Hub.

Constant updates

The tool is also always evolving and improving, thanks to user feedback and market news. Power BI Desktop, for example, always brings new features, improvements and fixes with each update. 

Has user communities

Whenever we start learning a new tool, we look for a community that can help us in the learning process. And with Power BI this is very easy, since it has a active and engaged community of users, who share tips, questions, ideas and solutions.

Integrate Power BI into your no code app

Now that you understand what Power BI is and how it can help you visualize your data faster, let's talk a little about its integration with a no code app. 

If you already follow us, you know everything about FlutterFlow. But let's explain it to you once again. 

FlutterFlow is a platform that allows you to create apps for iOS and Android through an intuitive interface and ready-to-use components. It is one of the best no-code tools available on the market today!

But what does FlutterFlow have to do with Power BI? The answer is: everything! You can integrate FlutterFlow with Power BI and create interactive dashboards in your application using no-code integration services.

Imagine being able to create a personal financial control app that connects Power BI directly with your bank. He could create a report and a dashboard that shows his income, expenses and investments in a simple and visual way. 

And this is just one of the many integration possibilities that can be made between Power BI and other no-code platforms! 

Discover No-Code Start-Up!

Programming with no-code platforms is the future and we want to help you become the best professional on the market. 

With the right knowledge, you can boost your career and start making money today. 

Take a FlutterFlow course for free and start your journey!

org

Watch our Free MasterClass

Learn how to make money in the AI and NoCode market, creating AI Agents, AI Software and Applications, and AI Automations.

No-Code Start-Up

Also visit our Youtube channel

Learn how to create AI Applications, Agents and Automations without having to code

More Articles from No-Code Start-Up:

The WhatsApp API is one of the main solutions for companies that want to scale their customer service and communication automation. 

WhatsApp, being one of the most popular messaging apps in the world, allows direct and efficient interactions with customers. However, when it comes to automation and integration, using the WhatsApp API becomes essential.

So, there are two main options for this integration: the Official WhatsApp Business API and the Unofficial APIs. But which one should you choose? 

In this article, we’ll explore the differences, advantages, disadvantages, pricing models, and costs to help you make the best decision for your project. Keep reading and find out which WhatsApp API makes the most sense for your business!

Types of WhatsApp available on the market: discover the options

types of whatsapp available in the market

Before we talk about WhatsApp APIs, it is important to understand the three main types of WhatsApp available:

Personal WhatsApp

WhatsApp Personal is the traditional version of the app, used by billions of people around the world. Intended for individual users, it does not include business-oriented features or automation.

WhatsApp BusinessVersion 

Version aimed at small and medium businesses. This version has features such as a product catalog, automatic messages and business profiles, but still relies on manual interactions. 

Furthermore, it allows the simultaneous use of two numbers on the same device, one in the personal application and the other in the Business application, in a completely legal manner and in line with Meta's guidelines.

WhatsApp Business API

Unlike previous versions, WhatsApp Business API is not an application, but a cloud-based solution that allows WhatsApp integration to different systems, enabling automation and personalization of interactions.

Companies that manage a large volume of messages use this API to optimize communication with customers, ensuring efficiency and scalability. With this solution, it is possible to:

  • automate the sending of messages and notifications;
  • to create chatbots for customer service;
  • integrate WhatsApp with CRMs, ERPs and other business platforms;
  • use artificial intelligence to personalize interactions.

How does the WhatsApp Business API work?

The WhatsApp Business API acts as a bridge between different systems, allowing softwares to communicate automatically. Since it is not an application installed on the cell phone, the entire operation takes place in the cloud, ensuring scalability and reliability for companies that need high-performance communication.

Although initially aimed at developers, today there are several solutions that simplify the implementation of the WhatsApp Business API, making it accessible to companies of different sizes.

Now that we understand the concept, let's explore the differences between the Official WhatsApp API and Unofficial WhatsApp APIs.

Official API vs. Unofficial API: Know the main differences

official api vs unofficial api differences

Businesses can choose between two types of WhatsApp API for integration:

  • Official WhatsApp Business API (provided directly by Meta or licensed companies);
  • Unofficial APIs (provided by third parties, without any connection to Meta, but within the law).

Next, we will understand the main differences between them.

Official WhatsApp Business API

The Official WhatsApp Business API is provided by Meta (Facebook) itself or by licensed companies. Meta recently began offering this service directly to end users, without the need for licensed intermediaries. 

This API can be integrated directly via Facebook's Business Manager (BM), ensuring security and compliance with Meta's policies. Among the main features of the Official API:

  • integration via Facebook Business Manager;
  • mandatory use of pre-approved message templates to start conversations;
  • billing based on conversations initiated;
  • restriction on sending messages outside of Meta's rules;
  • lower risk of blocking, as long as you follow the guidelines/

Please note that Meta does not allow unrestricted sending of messages. To start a conversation, it is mandatory to use approved message templates, ensuring that the contact complies with WhatsApp policies. The template categories are:

  • marketing: promotions, coupons and offers;
  • utility: order confirmations, delivery tracking;
  • authentication: sending verification codes;
  • service: user-initiated messages at no additional cost.

After the first template is sent, the conversation can continue normally for up to 24 hours without the need for a new template.

And how does billing work on the Official API?

The pricing for the Official WhatsApp API is based on conversations initiated and varies depending on the message category:

  • marketing messages: about R$ 0.36 per conversation started;
  • utility messages: approximately R$ 0.04 per conversation initiated;
  • authentication messages: around R$ 0.015 per conversation initiated;
  • client initiated messages: at no additional cost.

Other important points about billing include the 24-hour validity for each conversation initiated by the company, which means that if it is necessary to continue the interaction after this period, a new paid template will be required. 

Additionally, starting in April 2025, authentication and utility messages sent within this 24-hour window will no longer be charged.

Unofficial APIs

Unofficial APIs are solutions offered by third parties, with no direct relationship with Meta. Although they are not licensed, many of these APIs are completely legal and follow security standards. The main characteristics of Unofficial APIs include: 

  • simplified integration via QR Code;
  • allows sending messages without the need for pre-approved templates;
  • fixed price per integrated WhatsApp number;
  • greater flexibility for shipping and automation;
  • higher risk of ban in case of spam or inappropriate use.

Unlike the Official API, which requires template approval and follows strict rules, Unofficial APIs allow messages to be sent freely, without category restrictions or prior approval. This allows for more dynamic contact with customers, ideal for companies that need freedom in communication.

And how does the billing work? Unofficial APIs?

The pricing of Unofficial APIs varies depending on the provider. Some operate with fixed monthly plans, while others charge per connected WhatsApp number.

  • some companies offer plans starting from R$99 per integrated WhatsApp number;
  • others offer packages for multiple numbers, reducing the cost per account;
  • There are open-source options, which can be used free of charge, but require their own infrastructure.

Despite the freedom offered by Unofficial WhatsApp APIs, it is essential to consider the risks involved. Since there is no direct link to WhatsApp, these APIs are more prone to blocking, especially when used for mass sending without the proper consent of users.

Furthermore, Meta support and warranty are not available, which means that any technical issues or blockages will depend solely on the API provider.

Sending messages without the recipients' authorization can also result in restrictions, compromising the company's continued communication with its customers.

So which API to choose?

which whatsapp api to choose

Choosing between the Official WhatsApp API and Unofficial WhatsApp APIs depends on your business needs. While the Official API provides greater security and compliance, Unofficial APIs offer more freedom and predictable costs.

Evaluate your options based on your message volume, need for automation, and level of risk you are willing to take.

To learn more about automation and other efficient strategies for integrate chatbots, automatic notifications and artificial intelligence to your business, explore more at our YouTube channel and in the NoCode StartUp website.

Artificial intelligence is transforming the way we interact with technology, and AI agents are one of the most powerful advancements in this area. However, to make these agents truly effective, it’s essential to train them with data specific to your business.

In this article, we will explore how to create an AI agent using the RAG technique (Retrieval-Augmented Generation) to train models with custom information. You will learn three practical ways to implement this in your own project. 

Ready? Happy reading! 

What is an AI agent and how does it work with RAG?

What is an AI agent and how does it work?

Before we get into the practical part, it is important to understand the concept of an AI agent and how it can be improved using RAG.

Basically, an AI agent is a system that can interpret commands, process information, and generate responses autonomously. To do this, it needs three fundamental elements:

  • AI model: the agent is based on models such as GPT, Llama or Claude, responsible for interpreting and generating text based on learned patterns;
  • Base prompt: these are the instructions that define how the agent should behave and structure its responses;
  • memory: essential for AI to remember previous interactions. Some agents have both short-term and long-term memory, allowing the conversation to continue.

In addition to these features, an AI agent can be even more efficient when using the RAG (Retrieval-Augmented Generation) technique, as we mentioned earlier. This means that, instead of relying exclusively on the model's prior knowledge, it can query external databases, such as documents, PDFs, Notion pages, or spreadsheets. 

In this way, an agent trained with RAG becomes an expert in specific content, ensuring more precise and contextualized responses.

Method 1: Creating an agent with Dify

method 1 creating an agent with dify

Now that you understand the basics, let's get to the practical part: how to create an AI agent trained with your own data!

One of the easiest and most effective ways to create a RAG-trained agent is by using Difyi. This tool allows you to integrate knowledge bases into your assistant quickly and intuitively.

To train your agent at Dify, follow the step by step below:

  • access the “Knowledge Base” tab within the Dify platform;
  • upload your documents, such as PDFs, HTML files, spreadsheets or web pages;
  • Dify processes the files and transforms them into numeric vectors, converting the textual content into a format that AI can interpret efficiently.

This process is known as embedding, in which the tool structures the data on a vector basis, allowing the AI to search and retrieve the most relevant information whenever a question is asked.

Additionally, Dify makes it easy to create virtual databases by organizing knowledge into chunks of information. This way, when a user asks the agent a question, the agent quickly identifies which chunk of text best fits the desired answer.

With Difyi, you can create specialized agents for different purposes, such as:

  • customer support assistants, who access FAQs and technical manuals;
  • customer service chatbots, which answer questions about products and services;
  • sales agents, which use strategic information to personalize approaches.

The best part? Dify automates this entire process behind the scenes, making implementation simple and practical.

Method 2: Creating an agent with OpenAI Assistants and RAG

method 2 creating an agent with openai assistants

Another efficient way to train an AI agent with RAG is to use OpenAI Assistants. This solution allows you to create custom assistants, define specific behaviors, and incorporate documents so that the AI can query and respond accurately.

Unlike Dify, which automates much of the process, OpenAI offers greater control over the agent’s settings. To create your assistant using this tool, follow the steps below:

  • access the OpenAI platform and go to the “Assistants” tab;
  • create a new wizard, defining a name, description and specific instructions;
  • choose an AI model, such as GPT-4 Turbo, to ensure more complete and contextual answers;
  • Upload files that he will use as reference, such as technical manuals, internal documents, or knowledge bases.

When documents are added to the platform, OpenAI transforms this content into a vector database. This way, the agent can consult the information whenever necessary, without relying solely on the model's pre-trained knowledge. 

This allows it to provide more personalized and up-to-date responses without requiring a complete AI re-processing. Additionally, OpenAI manages all the infrastructure needed to store and retrieve this information, making it easy to implement for those who don’t want to set up their own database.

One of the main advantages of this approach is its ease of implementation, as OpenAI takes care of the technical part, making the process simple and intuitive. In addition, the model guarantees high accuracy, combining the power of GPT-4 Turbo with specific information about your business, making the assistant much more effective. 

If your goal is to create a specialized AI agent without having to set up an advanced technical environment, OpenAI Assistants can be a great choice.

Method 3: Creating an agent with N8N and Supabase

method 3 creating an agent with n8n and supabase

The third way to create an AI agent trained with RAG is by using the integration between N8N and Supabase. This approach allows greater control over the data and optimizes the search for relevant information within the vector database.

While tools like Dify and OpenAI Assistants simplify the process, using N8N in conjunction with Supabase offers more versatility and reduces operational costs by allowing the framework to be fully configured and managed within your own environment.

To create an AI agent trained with this combination, follow the steps below:

  • configure the vector database in supabase to store the reference documents;
  • upload the files that the agent will use as a knowledge base, such as manuals, FAQs or technical ebooks;
  • integrate Supabase with N8N to enable AI to query data and provide contextualized answers;
  • develop automated flows in N8N to structure agent interactions with users;
  • optimize agent responses by ensuring that they can access the most relevant blocks of information within the database.

But why use N8N and Supabase? with RAG?

Unlike other solutions, this approach allows for an advanced level of customization and control over the vector database. When a user asks the agent a question, it fetches the most relevant vector of data from Supabase, ensuring that the answer is based on the stored documents.

Additionally, N8N allows you to connect the AI agent to different applications, such as Whatsapp, Slack and Google Drive, expanding the possibilities of use and automation. This flexibility makes the model ideal for companies that need a highly specialized agent.

Among the main advantages of this implementation, the following stand out:

  • greater control over datas, allowing adjustments and customizations as needed;
  • cost reduction, as Supabase replaces paid solutions for vector storage;
  • advanced automation, with intelligent flows and integrations in N8N;
  • scalability, allowing the knowledge base to grow according to business needs;
  • greater efficiency, as the agent accesses information directly from the vector database, without relying solely on the AI model.

If you are looking for flexibility and cost reduction, N8N + Supabase is a powerful solution for training specialized AI agents with RAG.

Conclusion

Training an AI agent with your own data is an essential strategy for obtaining more accurate responses aligned with the context of your business. With RAG, you can transform internal files and documents into structured knowledge for AI, optimizing processes and improving the user experience.

If you want to dive deeper into the topic and learn how to create your own AI agents, check out the complete N8N course at NoCode Startup and take your automation to the next level!

Imagine you have a super-intelligent assistant trained based on all the knowledge available on the internet. However, when it comes to information specific to your business, it may not have direct references. So, how do you overcome this limitation?

One of the most effective ways to improve your assistant's intelligence is to train it with custom data, such as documents, articles, and internal files. 

This technique is known as RAG (Retrieval-Augmented Generation) and allows AI assistants to combine pre-existing knowledge with specific information to provide more accurate and useful answers.

Continue reading to better understand how this approach can transform the use of AI in your business.

How does RAG (Retrieval-Augmented Generation) work?

How does RAG work?

Now that we understand the concept of RAG (Retrieval-Augmented Generation), let's explore how it works in detail. 

Unlike traditional AI assistants that simply generate answers based on previously trained knowledge, RAG searches for information from external sources and combines that data with its prior knowledge to provide more accurate and relevant answers. 

The process can be divided into three main steps:

Ask the AI model

The user asks the AI assistant a question, just as they would in ChatGPT or another traditional chatbot.

Information Search (Retrieval)

The AI assistant queries a specific database, such as PDFs, websites, internal documents, or a business knowledge base. It retrieves the most relevant information to answer the question.

Augmented Generation

With the data retrieved, AI refines and structures the response by combining information from the knowledge base with its own linguistic model. This ensures a contextualized, accurate and relevant response.

This method is highly efficient as it allows AI to provide more personalized responses based on internal data. Additionally, the technology can leverage product documentation, support knowledge bases, and even company policies to ensure accurate and relevant information.

how does rag generation increase work

However, unlike a conventional chatbot, which responds based only on its original training, a RAG model can be constantly updated with new information, without the need for massive retraining.

In other words, this allows the AI to be highly dynamic and evolve progressively as new content is added, ensuring greater accuracy and relevance in responses.

For example, within the NoCode community, we provide assistants that use RAG to answer questions about tools such as make up, Diff, N8N and Bubble.

Furthermore, these assistants have been trained with specific documentation for these platforms, which allows them to provide even more detailed and accurate answers to students, thus facilitating learning and resolving technical queries.

5 Benefits of using RAG

Benefits of using RAG

Now that you understand how RAG works, let's explore the main benefits that this technology can bring to companies and users:

1. More accurate and contextualized responses

RAG enables AI assistants to query up-to-date information in real time, making responses more relevant and detailed.

2. Automation and efficiency

With the ability to access specific knowledge bases, AI reduces the need for constant human support, optimizing time and resources.

3. Continuous learning without the need for retraining

Unlike traditional AI models, which need to be constantly trained and retrained to learn new information, RAG can simply query updated databases.

4. Customization for different businesses

Companies can tailor AI to answer industry-specific questions by training the assistant with technical manuals, internal knowledge bases, and other relevant documents.

5. Applying RAG in customer support

In addition to academic and educational use, companies across a variety of sectors are using RAG to improve customer support.

Imagine a technology company that sells complex softwares. Customers frequently contact support with questions about specific features. 

With an AI assistant trained with RAG, a company can feed the AI with its internal knowledge base, technical manuals, and FAQs. This allows the agent to answer questions accurately and quickly, helping to reduce the need for human intervention and streamline customer support.

How to apply RAG in your business?

Companies from different segments can take advantage of this technology to improve internal processes, customer service and task automation. Below, check out some practical strategies for applying RAG to your business.

1. Identify your company's main needs

Before integrating RAG, evaluate which areas of your business can benefit from this technology. Ask yourself the following questions: 

  • Does customer support receive a lot of repetitive questions?
  • Does your team need to access technical documents frequently?
  • Is there a large database that could be better utilized?
  • Could internal training be optimized with an AI assistant?

2. Choose the right data sources

The great advantage of RAG is its ability to search for information from external sources. To ensure accurate and reliable answers, it is essential to select the best data repositories. Some options include:

  • technical documentation and product manuals;
  • FAQs and internal knowledge bases;
  • articles, research and case studies;
  • structured data from CRMS and ERPS;
  • pdf files, spreadsheets and notion.

3. Integrate RAG with your existing tools

For best results, RAG should be connected to the platforms your team already uses. Some ways to integrate include:

  • Chatbots and virtual assistants: AI trained to answer recurring questions and provide technical support;
  • Management systems (CRM/ERP): AI can access customer data to provide more personalized responses;
  • E-learning and corporate training: intelligent assistants that help employees access learning materials quickly;
  • E-commerce and customer service: chatbots that check inventory, return policies and product recommendations.

4. Evaluate and optimize 

Implementing RAG doesn’t end with the initial setup. It’s essential to monitor AI performance by analyzing metrics such as:

  • response accuracy rate;
  • user satisfaction;
  • reduction of service time;
  • most frequently asked questions and opportunities for improvement.

With this information, you can improve the AI database and ensure that the answers become increasingly accurate.

Conclusion

Whether it’s to improve customer support, automate processes or optimize internal knowledge management, RAG is a powerful and affordable solution for companies in different segments. 

With this technology, AI agents can access specific knowledge bases, improve the user experience and reduce the need for extensive training.

If you want to learn how to create intelligent AI assistants using N8N, check out NoCode Startup's complete course. In it, you will have access to practical training on automation and data integration to make your business' AI even more efficient.

Explore more about the N8N Course – NoCode Startup and start transforming your company with artificial intelligence! 

NEWSLETTER

Receive exclusive content and news for free

premium WordPress plugins
en_USEN
menu arrow

Nocodeflix

menu arrow

Community

Let's start your enrollment

Enter your name and email that you will use to access the content.

IMPORTANT: Do not leave spaces at the beginning or end of fields.